Intro to Loom Game Engine

Seasoned game & game-engine developer Ben Garney has a new game development engine called Loom.

Ben demonstrates competency in a long series of projects. He worked on the Torque Game Engine with GarageGames at www.garagegames.com (Site No Longer Live), the PushButton Game Engine for Flash with PushButton Labs at www.pushbuttonlabs.com (Site No Longer Live). Support from PushButton (including its website, updates to its source code and forums) abruptly ended in 2012. PBE’s spiritual successor launched in 2012 as Smash Game Framework at www.smash.io (Project apparently dead after no updates since more than ‘a year ago’).

Now he and his team have Loom, The Loom Game Engine at www.theengine.co. The word ‘loom’ is used for a device used for weaving textile projects and Loom is also a popular 80’s computer game, both spiritually aligned with game development. However, I wish it had a more unique name to facilitate online searches.

Pros of Loom (Paraphrased from theengine.co);

  • Pragmatic Development – Loom features a lean and fast workflow without strict development rules or required frameworks.
  • Freedom Of Choice – Access and edit C++ core source code, access and edit LoomScript core source code, or simply add your own custom LoomScript. LoomScript sits atop C++ and can access any C++ library.
  • LoomScript – LoomScript is an easy to use, new language modeled after AS3 with features inspired by C#. LoomScript is based on Lua which is concise, robust, proven, and supported by tools, debuggers, and community.
  • Useful Libraries – CSS Styling, UI Markup, Tweening, Dependency injection, JSON/XML and more…
  • Loom Architecture – Three parts; Call LoomCLI from your command line to create ‘new’ projects and ‘run’. The LoomSDK is precompiled LoomScript with powerful libraries. The NativeSDK is the raw C++.
  • Built For Teams – Three tiers; Artists can create & integrate assets into the latest build without bothering others. Scripters use LoomScript for the bulk of development. Need extra power? Extra features? Coders can access the C++ layer.
Pros of using one code-base for multiple platforms

When and where it is manageable, I am a huge fan of using  and reusing the same project for multiple platforms. Loom 1.x currently exports to TV (Ouya), Desktop (Mac & Windows), and Mobile (iOS & Android). Future support for other platforms is in discussion on the loom forums.

  • Save Time – Develop, iterate, QA simultaneously cross-platform
  • Focus Marketing dollars – Instead of marketing the game on two platforms separately, we can do it at the same time
  • Momentum – Word of mouth dictates that downloads on one platform will possibly translate into downloads on the other
  • Maintenance – We’d rather be working on the next game, than debugging separate platforms

What is Loom?

With cheap, powerful tools and massive exposure to new game players, there has never been a better time for indie game developers. – Me

There are many available tools for indie game development. Loom is a powerful 2D game engine with live reloading of code and assets, a friendly scripting language, and an efficient command-line workflow.

Loom’s competitors include 2D-capable gpu-accelerated cross-platform mobile game development platforms such as Adobe AIR, Corona & Unity3D as well as the newcomer Stencyl. The approach each platform takes is diverse. Where-as Stencyl is the a complete IDE for project setup, art & development which requires no coding, Loom is a raw platform without even a GUI.

Checkout the screenshots of Loom’s Workflow;

  1. Create a new project via command line.
  2. Create your raster assets using your favorite creative programs.
  3. Create your LoomScript code using any text editor. While a Loom IDE is a top feature request which is in active discussion, SublimeText is the current free, recommendation.
  4. Compile (run) the project via command line.
1. Project
2. Assets
3. LoomScript
4. Compile

Development Philosophy

We believe that fast iteration times across multiple devices simultaneously lead to better, faster, cheaper game development. – Loom Documentation

Loom‘s design goal is to keep you on the fast development path as much as possible, while still preserving access to slower, more difficult, but still essential development paths. This gives a substantial benefit to development teams without blocking them.

The Loom GameFramework

Loom offers a powerful (optional) Loom GameFramework (LGF). A game framework is a system to organize your code specific for game projects.

LGF is made of three general types of classes. There may be many of each type in each game project:

  • Manager – Managers are the brains of the operation — each one has a unique task; for instance one focuses on the spatial area of the screen and the objects within it and one on graphics rendering of visible objects. Depending on its role in the game, a manager may or may not relate to entities and components directly.
  • Entity – Each visual element in your game is represented by an entity. This could be anything; your player, the enemies, collectible items, etc…. Entities can be non-visual too.
  • Component — Each entity contains components. This is where the bulk of your game code lies. Each components handle a specific responsibility. For instance perhaps one component handles rendering the entity in which it resides.

Developers can extend existing managers and create new managers too. LGF ships with managers for our most common needs. Here is a partial list of the managers packaged with the core Loom.GameFramework package:

  • TimeManager – Manages all time related functionality in the engine. It provides mechanisms for performing actions every frame, every tick, or at a specific time in the future. A tick happens at a set interval defined by the TICKS_PER_SECOND constant. Using ticks for various tasks that need to happen repeatedly instead of performing those tasks every frame results in much more consistent output. However, for animation related tasks, frame events should be used so the display remains smooth. You can pause/play your game easily here too.
  • ConsoleCommandManager – Process and dispatch commands issued via the asset agent.
  • PropertyManager – Properties are like public variables; set/get manually or bind automatically.

Entities are essentially empty shells. As a developer you fill them with the core components &custom components needed. Each component has access to any Loom API desired and responds to custom events as well as the following built-in Loom events:

  • onFrame – Best used for graphics rendering-routines; this occurs once per frame-rate (e.g. 60 times per second for 60 FPS). Included for AnimatedComponent
  • onTick – Ticks are guaranteed to happen at a fixed interval. If the frame-rate slows down due to some number-crunching or heavy rendering, Loom will attempt to ‘catch up’ by calling more ticks. It balances the run-time experience well. Included for TickedComponent.
  • onThink – Based on an arbitrary, per-use timer. This is ideal for AI code which can be processed slowly (e.g. every 1–5 seconds). Included for QueuedComponent.

Getting Started

If you have setup a programming environment before (Flash, Java, HTML5), then you should find Loom easy to setup and use.

Here are the links and tips;

  1. Download Loom (CLI & SDK Together) – Visit the Loom downloads page.
  2. Download examples – See the list of examples or download and view the source-code from the Loom downloads page.
  3. Learn to run code with the examples and create new projects – Visit Loom getting started page and the Loom documentation page. Curiously, the class-by-class documentation is not available online, but is indeed downloadable.

Creating My ‘FlyerGame’

To learn Loom, I followed my own ‘Getting Started’ steps above and then created my own complete game. I used assets and game logic from “FlyerGame”, a game that I have recoded many, many times using game frameworks. The HD Video Screencast and source assets are available (See ‘Member Resources’ below).

Optimizations

I have limited experience with Loom, but from reading the Loom forums and reviewing the Loom example code I understand that optimizing a project – especially rendering with a constant frame-rate on a variety of devices takes time.

Conclusion

I like what Loom does well; LoomScript is light and powerful, the workflow is VERY fast. I haven’t tapped into the full strengths of device-specific CSS (e.g. to size a button uniquely on iPad vs iPhone) yet, but it looks really compelling.

Library of Libraries

Loom is based in great part to Cocos2d, a free community-based library for 2D gaming. Some people love and some people hate Cocos2D. A consciousness I see throughout the Loom forums is for ‘Loom’ itself to provide minimal functionality and instead depend on 3rd party libraries to provide developers with needed functionality. Some libraries will be folded into the Loom API and for others developers can mix and match libraries as they like. This ‘borrow vs build’ approach is not new. It is what provides huge functionality within the Javascript gaming world too. However, as a developer having a big bag of separate APIs (separate syntax, separate terminology, inconsistent value ranges…0 to 1 vs 0 to 100 vs 0 to 256) is not intuitive and severely hurts the learning curve. Furthermore such separation makes it hard in my opinion for Loom to compete in an all-too-crowded world of cross platform mobile game development tools.

Maturity

The product is both at “1.0” and costs money which to me means The Engine Co is positioning it as a finished product. However a look at the feature requests from the community and bug reports/omission from the forums, which include countless bare essentials (e.g. complete code documentation & incomplete method override support) is a sign it is not yet ready to stand against full realized competitive cross-platform mobile engine.

The engine also misses many device-specific features and most every OS-specific integration features (e.g. in-app purchase, social network integration, ad monetizations) which the forum promises are coming soon.

When the docs & wiki are complete and describe features which are implemented bug free the product can be recommended with more confidence. The team is working fast and communicates so frequently, that we may see that level of completeness very soon. A dedicated IDE (currently the #1 feature request) with auto-complete and more will help seal the deal.

The license pricing;

  • 1. Starter- Target desktop 0nly – Free!
  • 2. Indie – Target mobile too
  • 3. Pro – Includes support
  • 4. Enterprise – Includes more support

Developer Q&A

NOTE: Bonus Section!!!

Loom is very new and is changing rapidly. I reached out to Loom developers to get a reactions based on Loom CLI v#1.0.506 and Loom SDK v#sprint27.

PROs

  • Live Reloading – Greatly accelerates development
  • LoomScript – Easy to learn (especially from AS3) and powerful
  • Support – Loom dev team is open, responsive, and productive

I find the component-based architecture suggested in the Loom API to be powerful and a distinguishing feature among competitors.

CONs

  • Young platform – Has many bugs, missing basic implementations (“lots of loose ends”), and lacks must-have features of competitors
  • Lack of documentation, tutorials, & examples.
  • Rendering – The “CSS layout is pixel [dependent and] has little practical use”, and overall the “performance is not amazing”.
  • No full-featured IDE – Although a 3 code editors already provide partial support.

The lack of IDE is an obstacle for me. And the creator’s conscious choice to use existing 3rd party APIs to solve basic implementation needs is wise (provides functionality) but weakens the platform tremendously as it becomes a ‘bag of APIs’ which hurts the learning curve.

Gotchas & Advice

  • Read the docs
  • Download, read, and run the examples
  • Just “Dive into it!” and remake a basic game from scratch

“Is Loom ready for professional development?”

  • No, It is the “early days for the platform so there’s not so much”.
  • No, “standard mobile features like reading/writing to camera roll are not exposed yet (as far as I know)”.
  • Yes, I think its ready for professional deployment, If you can get over the bugs and [missing] features”.
  • No, we’d have to “spend a lot of time working on supplementing the engine, and less on making our games”.
  • And as one developer said – I am “not sure. I’d have to make a game with it!”

For me, Loom is absolutely ready for production in a vacuum. However there are many compelling alternatives to use which are more robust.

Next Steps

After ‘Getting Started’ and following my HD Video Tutorials, here are more resources to fuel your Loom savvy.

  • VIDEO: Welcome To Loom – Watch the HD Screencast Video Tutorial*
  • VIDEO: FlyerGame With Loom – Watch the HD Screencast Video Tutorial*
  • SOURCE CODE: FlyerGame With Loom – Download, view, and run the code.
  • Find common answers on the Loom forums page
  • Post your comments on Loom below on this blog page.

*See ‘Member Resources’ below.

NOTE: Source code is available, but videos are NOT yet available.

Member Resources

[private_Free member]Enjoy this members-only content!

NOTE: Source code is available, but videos are NOT yet available.

Source Code

HD Screencast Videos

  • None yet.

[/private_Free member]

Unity3D for Game Development

Unity3D (or simply ‘Unity’) is a fully integrated development engine that provides rich out-of-the-box functionality to create games and other interactive 3D content. You use Unity to assemble your art and assets into scenes and environments; add physics; simultaneously play test and edit your game, and when ready, publish to your chosen platforms, such as desktop computers, the Web, iOS, Android, Wii, PS3 and Xbox 360.

Unity’s complete toolset, intuitive workspace and rapid, productive workflows help users to drastically reduce the time, effort and cost of making games.

As always, RivelloMultimediaConsulting.com/unity/ will be the central location for deep articles and tutorials, Facebook.com/RivelloMultimediaConsulting (like us!) will engage the growing RMC+Unity community, and for the latest opinions and cool links follow me at Twitter.com/srivello

Unity’s Top News Announcements

Updated!

There is incredible momentum in the Unity3D product and its community. Here is a look at Top Unity News Announcements.

Features

Pros of Unity3D (Paraphrased from Unity3D.com); 

  • Multi-platform Development – Desktop (Mac OSX , Windows)
  • Multi-platform Deployment – Web Browsers (using the Unity WebPlayer), Desktop (Mac OSX w/ OpenGL, Windows w/ Direct3D), Mobile (iPhone, iPad, Android phones and tablets), and console (Wii, PS3 and Xbox 360). The Unity Editor emulates all your selected platforms too. The Unity3D Engine is gorgeous and performant. Unity even offers Union a way to license out your games to find an audience.
  • Powerful Coding – Unity makes it simple to keep your code working across many devices. Unity abstracts away the majority of platform differences. When precise control is needed, simply use #ifdef to specialize code per platform. Unity supports 3 languages that can be combined within the same project; C# (seems to be the most ‘professional’ option), JavaScript, and Boo programming languages.
  • Powerful Editor – Manage assets & code, drag and drop to build your scene (2D or 3D), the editor’s stage *IS* the Unity runtime (so you get high fidelity previews as you work), instant build times, see public script properties in the ID for easy viewing/editing.
  • Flexible Asset Workflow – Within the editor you don’t create assets per se, you import them (see docs & see supported formats) from other programs (all popular formats such as Photoshop and Maya) and manage them within your scenes.
Pros of using one code-base for multiple platforms

When and where it is manageable, I am a huge fan of using  and reusing the same project (including all source and code) for multiple deployment platforms. Unity supports this very well.

  • Marketing dollars – Instead of marketing the game on two platforms separately, we can do it at the same time
  • Momentum – Word of mouth dictates that downloads on one platform will possibly translate into downloads on the other
  • Maintenance – We’d rather be working on the next game, than debugging two separate platforms

What is Unity?

Unity is the combination of a project editor, a code editor, and the run-time player. The project editor allows for creation of new projects, manipulation of 3D objects within the 3D world*. Its the glue that brings together your assets, your code and its where you performs the project builds.

*Note: Another tool such as the premium Maya or the free Blender3D studio max is required to do any complex modeling and animation.

The Unity Player (used only for playback in desktop web browsers) is gaining popularity. So is the popularity of developers using the Unity Editor. See these images;

unityStats_v1
Figure 1. Unity3D Stats


It takes some time to appreciate the workflow of Unity. A developer will likely have several applications open at once while working.

Checkout the screenshots;

  1. Unity Editor: Create your project, edit the properties of your game objects, and build your game.
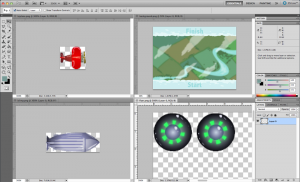
  2. Create your assets using external tools (Photoshop shown); 2D, 3D, sound, etc… and import them into the Unity Editor.
  3. Code Editor: Unity is compatible with any text editor and comes packaged with the very capable MonoDevelop code editing tools. MonoDevelop has formatting, syntax highlighting, intellisense, and autocomplete.
  4. Asset Store – Within the IDE itself you can shop online to find assets of any type (2D, 3D, sounds, etc…) as well as ‘packages’ which are groups of reusable code which enable new C# functionality as well as add completely new UI* and tools within the Unity Editor authoring environment too. The organization of the assets is great. I get the feeling (so far) that the best way to find packages is through the store (vs Googling, downloading, & importing – which is also possible). However the store is dreadfully slow and buggy, I assume because it is just a clunky webpage loaded through the Unity IDE.

Note: The extensibility within the Unity Editor itself is inspiring. No other game development environment has 3rd party free and premium tools which actually change how the IDE itself functions.

Figure 2. Overview of the User Interface (UI)
assets
Figure 3. Setup Game Sprites
Figure 4. Code Editor
Figure 5. Free & Premium Asset Store

Unity Design Philosophy

There is a hierarchy to everything in Unity; Project -> Scene -> GameObject -> Component -> Properties. Typically, when we talk about ‘things’ in our game we are talking about a specific ‘GameObject’ in a ‘Scene’. An empty game object contains just a ‘transform’ component (which is required). Using menu GameObject -> Create Empty you can make one and add it to the scene.

Two core, Unity-specific data types are;

  • GameObject:  The GameObject is the base class for all entities in Unity scenes. It is not necessarily visual, but commonly is (e.g. Cube, Sphere, Plane)
  • Component:  Created from MonoBehaviour, which is the base class every script derives from. Much of your code goes here.

The Transform Component

It is impossible to create a GameObject in Unity without a Transform Component. The Transform Component is one of the most important Components, since all of the GameObject’s Transform properties are enabled by its use of this Component. It defines the GameObject’s position, rotation, and scale in the game world/Scene View. If a GameObject did not have a Transform Component, it would be nothing more than some information in the computer’s memory. It effectively would not exist in the world.

The Transform Component also enables a concept called Parenting, which is utilized through the Unity Editor and is a critical part of working with GameObjects. To learn more about the Transform Component and Parenting, read the Transform Component Reference page.

You can see here (Figure 6.) how it is represented in the Scene Window, the Hierarchy Window, and the Inspector Window. You can see the Transform component which includes position and other properties. Also note the inviting ‘Add Component’ button. GameObjects exist so you can add components to them. The components do most of the work.

An empty GameObject
Figure 6. An empty GameObject

Other Components

The transform component is critical to all GameObjects, so each GameObject has one. Here (See Figure 7.) we see that GameObjects can contain other components (2-way purple arrow icons) too and components can refer to assets (cloud icon)

GameObject vs Component. From www.raywenderlich.com/
Figure 7. GameObject vs Component. From www.raywenderlich.com/

Component <-> Component Communication

Any class instance (of any type) can access one of the active GameObjects in the hierarchy via GameObject.FindObjectOfType( typeof ( MyGameObject ) ). For example your ScoreBoard class instance can access all the Enemy class instances to display a “Enemies: 5/10” display.

Within any one GameObject it is common that one or more Components will need to communicate. For example your keyboardInputComponent instance can call walkingComponent.walkRight(). Advanced developers may create their own solution to for need. However, for beginners, here are the popular techniques for Component <-> Component communication;

Properties

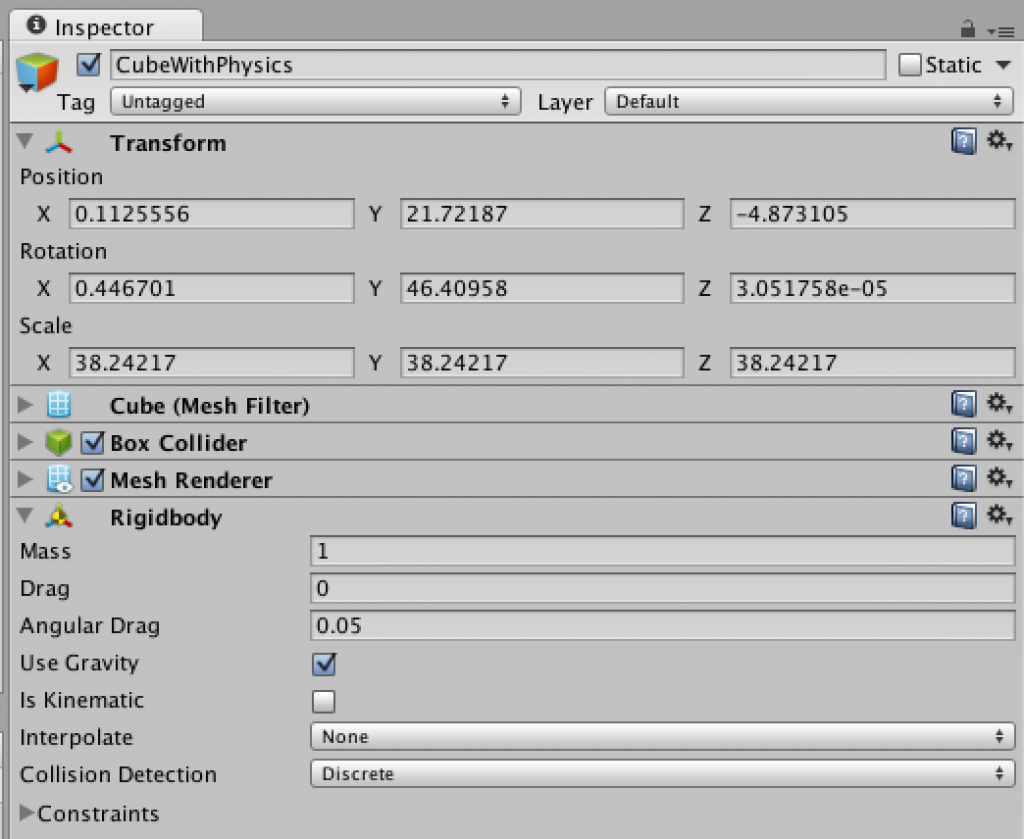
As mentioned each component contains properties. These are the granular values such as Mass, Drag, and Use Gravity (See Figure 8.) that affect how a component behaves. Not every variable within a component is editable, but all editable ones are exposed as properties through the inspector. At author-time and even at run-time you can edit these values. Very friendly for iterative development.

Figure 8. GameObject with 3D Physics


Editable Editor

One of the most shockingly cool features of Unity is that the Editor tool itself is completely scriptable.

  • Want a different icon to float over a particular GameObject in the Scene window? Script it!
  • Want a property editable in the Inspector window? Script it!
  • Want your custom components in main menu? Script it!
  • Want an entirely custom window (e.g. a home-made texture painting program)? Script it!

Everything scriptable about the Unity experience can be shared between your projects and with other developers (free or premium cost).

Gotchas

Unity’s complexity may have you scratching your head as you get started (and for years to come). It is a very deep and powerful tool. Here are some quick answers to some puzzling ‘gotchas’.

Only For The Third Dimension (3D)?

Unity3D, as its name suggests is a 3D-enabled IDE to create content in a 3D-enabled runtime. There is no option to NOT render your project in 3D. There are always x (width), y (height), and z (depth) to the positioning of every asset in your project. However, this does not mean you can’t create 2D gaming. By setting your camera’s perspective to Orthogonal, the camera will ‘render objects uniformly, with no sense of perspective’. Lock the z (depth) of every GameObject and WOW, now you have a 2D game running in a 3D engine. While this may sounds counter-intuitive or inefficient, it is not. This is the same way many 2D games are created on other platforms too.

Note: Any developers hoping to do 2D should strongly consider 3rd party Unity packages to assist the process. There is MUCH to learn and the tools are very helpful to both fill in the knowledge gaps and provide tools which make development much faster. One of the most popular recommendations for 2D in Unity is called 2DToolkit.

Editable Runtime

Probably the largest single source of confusion during your first day of unity is that you can EDIT your source while the project is PLAYING. There are 3 play controls in the IDE (and via the edit menu); play, pause, and step.

Click play to play and click pause to pause. The trick is that WHILE playing you can still use the IDE; you can drag things into and out of the live scene, you can move the camera, you can edit code, you can change assets, and more! This is very powerful, HOWEVER, once you click pause all of your changes are lost. So be sure you click PAUSE before you return to edit your scene. Obviously this feature is very powerful, you can tweak settings in your live scene without needing to pause/play again. Just be careful.

With the power of Unity there is A LOT to learn. Luckily the editor and the language features are intuitive and there are ample tutorials and sample projects to get started. Still, it is intimidating.

Prefabs

Prefabs are a collection of GameObjects (e.g. a 3D Mesh of your hero character)  & Components (e.g. one unit of code that helps accept keyboard input to move your hero character) that can be re-used in your scenes. Several identical objects can be created from a single Prefab, called instancing. Take trees for example. Creating a tree Prefab will allow you to instance several identical trees and place them in your scene. Because the trees are all linked to the Prefab, any changes that are made to the Prefab will automatically be applied to all tree instances. Assets may be created by you or your team or downloaded for free or for cost within the app store within the IDE.

Asset Store

Unity’s Asset Store is home to a growing library of free and commercial assets created both by Unity Technologies and also members of the community. A wide variety of assets is available, covering everything from textures, models and animations to whole project examples, tutorials and Editor extensions. The assets are accessed from a simple interface built into the Unity Editor and are downloaded and imported directly into your project.

Getting Started

With the power of Unity there is A LOT to learn. Luckily the editor and the language features are intuitive and there are ample tutorials and sample projects to get started. Still, it is intimidating.

Here are the links and tips;

  1. Download The IDEUnity3D and install it. Its free. There is also a pay version with many (non-essential) additional features.
  2. Watch My HD Screencast Video – Watch me talk you through as I create a complete game from start through finish. (See ‘Member Resources’ below)
  3. Review My Sample Project Code – (See Members Resources below).

Making ‘FlyerGame’

To learn Unity3D, I created several simple, but complete games. I include one here to help you learn too. I used assets and game logic from “FlyerGame”, a game that I have recoded many, many times using game frameworks. The HD Video Screencast and source assets are available (See ‘Member Resources’ below).

Conclusion

Coming from a 13 years of Flash Player game development as well as JavaScript game development Unity feels at times a huge polished step forward yet also a clunky gaming-with-training wheels step backward.

The C# language – is AMAZING. I’m constantly figuring out new language features and powerful new ways to solve old problems. The language speed is great. The MonoDevelop code editor is very strong.

The graphics – and sound-performance is stunning. The quality of the output of desktop games from Unity is incredible when compared to any casual-game development platforms yet obviously less-so when compared to professional-grade commercial gaming platforms such as Unreal Engine and CryEngine.

Ease of development – considering how much you can do with Unity (huge 3D worlds for desktop vs simple 2D mobile games) it is easy to use. The Unity Editor is also very strong. Every game requires 1 or more scenes. That makes sense. Each scene requires at least one object inside – typically many. I still feel more comfortable if I could just bind a script to the scene (with no objects) and completely script the experience. Perhaps with time I’ll change my mind on that.

Community – I strongly DISLIKE that Unity has a history of many programming languages. Three are in use  today. Perhaps for some there are benefits, but for me the obvious choice is C# and coming across tutorials, code samples, and projects in another languages (JavaScript or Boo) is a hassle.

Documentation – The Unity3D website, its documentation and its help section are all FANTASTIC. At the time of this article 5 of the 9 ‘learning modules’ have complete code and HD video. There is also one complete game project with 60-70% coverage so far with step-by-step tutorials. This is all new since Unity 4.x.

Next Steps

*See ‘Member Resources’ below.

NOTE: Source-code is already available for download. However, videos are NOT yet available.

Member Resources

[private_Free member]Enjoy this members-only content!

NOTE: Source-code is already available for download. However, videos are NOT yet available.

Source Code

HD Screencast Videos

  • None yet.

[/private_Free member]

Stencyl for Game Development

In my years of game development, I never wished for a tool (IDE) to create games without any programming. But I recently found one.

Maybe I never thought it would be possible. Maybe I never thought the games would be good. Maybe because I knew how to code, I didn’t care. The Stencyl Toolset from Stencyl, Inc. is surprising in both its ease of use and its flexibility to create a variety of games.

But can it replace traditional game-programming? Well, let’s take a look.

Pros of Stencyl (Paraphrased from Stencyl.com);

  • Game Studio In A Box – Stencyl is a gorgeous, intuitive toolset that accelerates your workflow and then gets out of the way. In addition to the core tools, there is an included image editor called Pencyl and tile creation and editing tools for tile-based games (i.e. PacMan).
  • Show and Tell – Use StencylForge the community-based toolbox of sprites and game logic to power your projects and share your knowledge.
  • Design In A “Snap” – Drag-n-drop code like Lego-blocks. If you are a coder, I know this sounds SCARY. Check it out.
  • Test it Fast – Run quickly using onscreen emulators for rapid code-test-code cycles. TBD on my opinion of the debugging features.
  • Play It Everywhere – Publish to iOS, Flash, Windows, Mac & the Chrome Web Store. (Android / HTML5 Coming Soon)
  • Make Money – Well, monetizing games is not unique to Stencyl of course, Stencyl has monetization features but there are many Pros of using one code-base for multiple platforms.
Pros of using one code-base for multiple platforms

When and where it is manageable, I am a huge fan of using  and reusing the same project for multiple platforms. Stencyl 2.1 (current release) exports to Flash (Desktop/Browser) and Mobile (iOS). Future releases will publish to Android and HTML5.

  • Marketing dollars – Instead of marketing the game on two platforms separately, we can do it at the same time
  • Momentum – Word of mouth dictates that downloads on one platform will possibly translate into downloads on the other
  • Maintenance – We’d rather be working on the next game, than debugging two separate platforms
  • Laziness – Corona SDK has a lot of modules already built in, ie Facebook, OpenFeint

What is Stencyl?

Stencyl is a an integrated development environment (IDE), for your Mac/Windows computer. It allows veteran game developers and (especially) newbies develop new game projects without requiring other tools and without requiring any programming skills.  In addition to Stencyl, also using a few programs (such as Photoshop) to create assets and having some solid experience with both programming and game design will PROBABLY be required to create something really good.

Checkout the screenshots;

  1. Create your game assets (backgrounds and sprites) using your favorite drawing programs or download them from StencylForge.
  2. Setup your game sprites. These ‘Actors’ as they are called can be animated and controlled by the computer AI or by the user.
  3. Setup your game logic. Stencyl’s most controversial feature is the logic system which requires NO PROGRAMMING. There is comprehensive documentation to help. Check it out.
  4. Design your levels. You can drag and drop assets into a grid system or free-form layout. Whatever you like!*

* The potential to use Stencyl JUST for level creation on non-Stencyl projects has me very excited. I haven’t tried that yet, nor know if its possible. Post below if you have some ideas.

Create Assets or Use StencylForge
Setup Game Sprites
Setup Game Logic
Design Levels

Stencyl 2.x maintains separate engines for our Flash and iOS exporters. Something that the team admits has been a challenge to maintain. Stencyl 3.0 (release date TBD 2012) will use a single engine and language that exports native apps to Flash, iOS, Android, Windows, Mac, Linux and HTML5.

Getting Started

If you have setup a programming environment before (Flash, Flex, Java, HTML5), then you should find Stencyl VERY easy to setup and use. Its slick and mainstream in its ease of use from initial install through project building. If you have never used multimedia tools, it may be a bit challenging, but know that you are in good hands. Stencyl’s has some user experience (UX) hiccups, but it is, overall, very impressive.

Here are the links and tips;

  1. Download The IDEStencyl and install it.
  2. Go Through the Crash Course – After downloading Stencyl, I strongly recommend going through the Crash Course. If you’re launching Stencyl for the first time, you’ll be automatically asked to go through the Crash Course. If not, click on the Help Center button to find it.
  3. Read Stencylpedia– After you’ve made your first game using the Crash Course, we highly recommend reading through the first few chapters of Stencylpedia (up to the end of Chapter 4).Stencylpedia will teach you the fundamentals of game creation through Stencyl, in a way that poring over many example games won’t do.
  4. Inspect Free Games – You can learn a lot as a beginner by looking at the included games and free games on StencylForge. Exame the scenes, actors, and behaviors.
  5. Watch My HD Screencast Video – Watch me talk you through as I create a complete game from start through finish. (See ‘Member Resources’ below)

Making ‘FlyerGame’

To learn Stencyl, I followed my own ‘Getting Started’ steps above and then created my own complete game. I used assets and game logic from “FlyerGame”, a game that I have recoded many, many times using game frameworks. The HD Video Screencast and source assets are available (See ‘Member Resources’ below).

Optimizations

With my simple tests, Stencyl games appear to run smoothly. It’s likely that performance problems are run-time performance problems (i.e. Flash or iOS) and not necessarily Stencyl performance problems.

Recommendations;

  • Limit number of on screen actors – That’s the fundamental optimization. When not possible use ‘recycling’ (VERY IMPORTANT) which is Stencyl’s version of object pooling.
  • Limit number of collisions – Stencyl uses Box2D for its physics engine, and the more Stencyl makes use of Box2D, the more calculations it’s performing in a given frame. Since collisions means the physics engine is working, more collisions means potential slowdown.
  • Limit use of effects and transparency
  • Limit overlapping actors (i.e. actors on top of actors)

Conclusion

I like Stencyl. I applaud what they are trying to do; create a simple tool to allow newbies to create games and veterans to create more games, more easily. I think many veterans will be turned off by Stencyl as a ‘toy’, and many newbies may be too shy to give it a try. I encourage both groups to give it an honest try. Above all I’m excited for the future of gaming.

Tools like [Stencyl] are yet another sign that game development can be both a great hobby to some and lucrative profession to others. – Me.

There are some other game studios I have yet to fully review such as GameSalad and GameMaker. Stay tuned. I may review them in the future.

Wait, No programming?

I make a few mentions here that Stencyl requires no programming. Really, to be more accurate you ARE coding, you ARE programming and quite deliberately. You have to understand all of the common game logic concepts. What are are NOT doing is typing. Instead you use drop-down menus – part of a layout which Stencyl calls the “block-snapping interface”. Very pretty, helpful, & intuitive. For advanced users there is indeed a code view and programming API (both currently AS3-only). Looking at the code is not only optional, it is not encouraged.

I have some strong opinions by code-generation tools (i.e. Adobe’s Dreamweaver), but I think there is indeed a large audience that can be served well by Stencyl’s ease of use. I am impressed with its power and flexibility. While not the creators intention, I also see Stencyl as a great tool for complete game developer beginners to learn all the fundamentals and then perhaps move on to a more traditional programming environment in the near future or distant future if they have the interest. Academically, Stencyl has fascinating potential too providing a language-agnostic approach to gaming for first year students, before they have the programming skills to power their creative ideas.

In short, after testing Stencyl, my opinion of it changed from just a ‘pretty toy’ to a ‘fun and powerful tool’. The roadmap provided on the Stencyl website looks fantastic too, rounding out more publishing options and hinting at a more robust tool too. Give Stencyl 3-4 hours of your attention over a weekend. It may very well change your mind for the better too!

The license pricing;

  • 1. Stencyl 2.x – Publish Flash Games – Free!
  • 2. Also Publish Desktop Games – $79 per year
  • 3. Also Publish iOS Games – $149 per year
  • Combo of 1,2,3 – $199 per year

Developer Q&A

Since I am new to Stencyl and Stencyl is so very different then other game development tools, I met with some Stencyl developers (newbies and veterans) to understand the PROs, CONs, and any gotchas that could help newbies learn from their mistakes.

PROs

  • No coding needed (unless you want it) 
  • Helpful community
  • Cross-platform

CONs

  • “Newbies must choose between limited ‘Free’ version and expensive ‘Pro’ version” – Game Developer, Urie Wilson 
  •  The learning-curve on more complicated parts (lists, global attributes, collision shapes) can be intimidating

Gotchas

  •  “Always save your project. [Stencyl may crash]” – Game developer, Ridhwaan Patel

Misc / Advice

  • Stencyl works well with Pencyl (image editor)
  • “Start Small. Reconstruct retro projects like Tic-Tac-Toe, Pong, Pac-Man, & Space Invaders. These simple, familiar games offer many challenges to newbies.” – Game Developer, Djamel Berkaoui (aka Satyre)

Next Steps

After ‘Getting Started’ and following my HD Video Tutorials, here are more resources to fuel your Stencyl savvy.

  • VIDEO: Welcome To Stencyl – Watch the HD Screencast Video Tutorial*
  • VIDEO: Flyer Game With Stencyl – Watch the HD Screencast Video Tutorial*
  • Start with the Stencylpedia – Online. Its the instructions manual. Also checkout the blog and the product roadmap.
  • Find common answers – The forums are best when you’ve got a specific question to ask.
  • Ask a new question – The Chat Room is great for seeking real-time help.

*See ‘Member Resources’ below.

NOTE: All Member Resources are coming soon. Videos and code downloads are NOT yet available.

Member Resources

[private_Free member]Enjoy this members-only content!

NOTE: All Member resources are coming soon. Videos and code downloads are NOT yet available.

Source Code

  • None yet

HD Screencast Videos

  • None yet.

[/private_Free member]

Corona SDK for Mobile Development

Developing iOS apps using CocoaTouch and XCode is great. Creating games however is a challenge.The tools are just geared to app development I think.

Developing Java-based Android games seems pretty horrible all around. Java is great (powerful but not easy), but the code-test-code development cycle leaves much to be desired.

Luckily there are 3rd party SDKs that create native iOS and also native Android projects geared for gaming. One of those is the Corona SDK from AnscaMobile.

Benefits of Corona SDKfor iOS/Android Development (In AnscaMobile’s words);

  • Build Apps 10x faster – Corona’s framework dramatically increase productivity. Tasks like animating objects in OpenGL or creating user-interface widgets take only one line of code, and changes are instantly viewable in the Corona Simulator. You can rapidly test without lengthy build times.
  • Same code, multiple stores – Corona is the only complete solution for developing across platforms, OS versions, and screen sizes. You can write once and build to iOS, Android, Kindle Fire or Nook Color at the touch of a button — Corona will automatically scale your content across devices from phones to tablets.
  • Simple, powerful APIs – Make use of advanced features using just a few lines of human-friendly code. For instance, you can implement realistic physics in your game with just five lines! Corona’s ease of use is what allows developers from indies to major studios to create #1 chart-topping apps, games, and eBooks.
  • Create engaging experiences – Say goodbye to cookie-cutter apps. Whether you’re creating branded apps, graphically rich games, or interactive eBooks, Corona gives you everything you need to go beyond the ordinary. It’s easy to make your apps behave and look exactly how you want them to.
  • Cut costs. Monetize faster – Corona enables you to produce top titles without big studio budgets. And thanks to Corona’s integrated support for in-app purchases, banner ads, and offer-based virtual currency, you can monetize faster and easier than ever before.
  • Join developers like you – Corona boasts a very generous and knowledgeable community, a plethora of 3rd party tools, as well as a shared code repository where users can download and share helpful libraries and snippets with one another. We also have 347 Corona SDK studios across 47 countries worldwide

Pro’s and Con’s of Corona (In my words)

I have used Corona SDK for about 5 hours. I’m new.

  • Lua is very very fast.
  • The code-test-code cycle is the best setup I’ve ever seen. Its so fast, just save your latest lua file and *poof* the project compiles and growl (on Mac) shows an error or not and your project is already running with debug output. (Now if I can just get the LDT IDE to handle debugging. I can, soon!)
  • Lua is not OOP. Corona is not component based. Without built-in OOP or built-in component based gaming (like Unity for example), development with Corona leaves much to be desired.
  • Its 2D only (good or bad, depending on your preference)
  • No great IDE yet.
  • Graphics are raster-based – So its a fast, but not easily reusable graphics pipeline.
  • Compared to HTML5 it has good multimedia capabilities. Compared to Flash it has horrible multimedia capabilities
Developing one code-base for multiple platforms (iOS/Android) is great. As Leetr.com mentions;
  • Marketing dollars – instead of marketing the game on two platforms separately, we can do it at the same time
  • Momentum – word of mouth dictates that downloads on one platform will possibly translate into downloads on the other
  • Maintenance – we’d rather be working on the next game, than debugging two separate platforms
  • Laziness – Corona SDK has a lot of modules already built in, ie Facebook, OpenFeint

Getting Setup

The steps to get started are to download the Corona SDK, choose your favorite text editor (I’m using Lua Development Toolkit), and run Corona’s Simulator on one of the sample projects to prove you’ve got it all setup properly.

We’ll show the provided ‘Bridge’ project which is a physics demo of some circles falling on a monkey-bridge.

Here are the links to get setup and publish a sample project;

  1. Download the free, unlimited-use Corona ‘Trial’ From AnscaMobile.
  2. Download the free, standalone Lua Development Toolkit (LDT) IDE from Koneki.
  3. Run LDT. You use LDT to setup the project and edit the code, but NOT for Corona code completion, NOT to compile and NOT to debug. I’m confident that all of that is possible, but I’m not yet sure how.
  4. Right-Click the ‘Script Explorer’ and choose ‘New Lua Project’
  5. Name it ‘Bridge’, choose ‘Create Project…’ and point to local url on your machine for ‘CoronaSDK/SampleCode/Physics/Bridge/’ where you installed the SDK.
  6. Open ‘CoronaSDK/SampleCode/Physics/Bridge/main.lua’, by clicking it in the ‘Script Explorer’. Don’t edit it. Just look at it.
  7. Run the ‘CoronaSDK/CoronaTerminal.app’ (on Mac). It will open terminal and also the Corona Simulator.
  8. In the Corona Simulator choose ‘File -> Open…’ and choose ‘CoronaSDK/SampleCode/Physics/Bridge/’. This will run the Bridge project in the Corona Simulator (an onscreen iPad emulator) and show any debugging output in the terminal.
  9. Done.
  10. Now without closing the Corona Simulator or the Corona Terminal, edit the ‘CoronaSDK/SampleCode/Physics/Bridge/main.lua’ file. Add the line ‘print (“hello”);’  without outer quotes and save the file. Upon save the Corona Simulator and Corona Terminal will automatically re-run the project. Nice!

Hello World Project

Typically a Hello World program illustrates the quickest way to get anything (such as text) onto the screen and publishing (or compiling) without errors.

In this post I have also added a few things. We see classpathing (‘com.rmc….’), a custom super class, and examples of publicity and privacy for class members.

The Project Output

Here is the example running. Corona’s included device emulator (“Simulator”) is in iPad mode. Other modes are available.

Debugging: Corona shows your debugging output too (using Terminal for example on Mac OSX). Simulator & Debug Window

The Project File Structure

Corona has many great demo projects included. Each project sits in its own folder. All files for a project sit within without using subfolders. I read on several blogs that while the Corona simulator allows for subfolders, that iPhone and/or Android does not. There are workarounds.

A development environment that does not allow for folders is ridiculous & irresponsible. – Me.

You’ll see my examples all feature a folder structure. For now, they run in the Simulator and that’s all I care about. I assume full folder support will come at some point in the future. If not, you can remove the subfolders from my demos before you start your final code.

HelloWorldOOP File Structure

Document Class

Lua doesn’t support OOP. Corona doesn’t support OOP. However it is possible to fake it.

I learned a good bit from Ludicroussoftware.com’s post, and JesseWarden’s post. There is more info about scope too.

The document class is the main entry point for your application. By default the builder looks for ‘main.lua’, and runs it. It is a required file and it kicks off the run-time of your project.

The lua file format shown here is my own creation. I use it for the main.lua file and then within any ‘classes’ which I create.

[actionscript3]

————————————–
— Imports
————————————–
local TemplateClass = require ("com.rmc.projects.helloworldoop.TemplateClass");

————————————–
— Metadata
————————————–

————————————–
— Main Entry Point
————————————–
display.setStatusBar( display.HiddenStatusBar )

–CLEAR OUTPUT
print ("");
print ("");
print ("  ——————-  ");
print ("  — HelloWorldOOP —  ");
print ("  ——————-  ");
print ("");

–CREATE
local templateClass = TemplateClass:TemplateClass();
print ("    samplePublicVar    : "..templateClass.samplePublicVar);

–TEST MEMBERS
local samplePublicMethod_str = templateClass:samplePublicMethod();
print ("    samplePublicMethod_str           : " .. samplePublicMethod_str);

[/actionscript3]

1. Imports

There are no true ‘imports’ in Lua, nor in Corona. The ‘require’ statement fetches a separate lua file and includes it in the current lua file. In my usage this essentially ‘imports’ the custom ‘class’ of ‘TemplateClass’.

2. Metadata

While not shown here in main.lua, within some classes there are ‘module’ statements (and others?) that help Corona/Lua know how to treat the current file. I call this ‘metadata’.

[actionscript3]

————————————–
— Imports
————————————–

————————————–
— Metadata
————————————–
module (…, package.seeall)

————————————–
— Class Methods
————————————–
— PUBLIC STATIC
–[[
This method is designed to…
–]]

————————————–
— Class Properties
————————————–
— PUBLIC STATIC
–[[
This property is designed to…
–]]

————————————–
— Class
————————————–
–[[
This class is designed to…
–]]
function TemplateClass()

————————————–
— Properties
————————————–

— INSTANCE
–[[
This is a self-reference required by OOP structure
–]]
local me = {}

— PUBLIC
–[[
This property is designed to…
–]]
me.samplePublicVar = "samplePublicVar";

— PRIVATE
–[[
This property is designed to…
–]]
local _samplePrivateVar = "samplePrivateVar";

————————————–
— Constructor
————————————–
–[[
This is the constructor…
–]]
function me:constructor()

–TRACE
print ("TemplateClass:constructor()");

–METHODS
me:initialize();

–RETURN
return me;
end

————————————–
— Methods
————————————–

— PUBLIC
–[[
This is the initialize.
–]]
function me:initialize()

–TRACE
print ("TemplateClass:initialize()");

–DRAW

end

–[[
This method is designed to…
–]]
function me:samplePublicMethod()

–Test Private — It Works!
local _samplePrivateMethod_str = _samplePrivateMethod();
print (" _samplePrivateMethod_str : " .. _samplePrivateMethod_str);

return "samplePublicMethod";
end

— PRIVATE
–[[
This method is designed to…
–]]
function _samplePrivateMethod()
return "_samplePrivateMethod & ".._samplePrivateVar;
end

————————————–
— Events
————————————–

— PRIVATE
–[[
This event handler is designed to…
–]]
function _onSampleEvent()
return "_onSampleEvent";
end

— RETURN INSTANCE VIA CONSTRUCTOR

return me:constructor();
end
[/actionscript3]

1. Class Definition

In my solution I place the ‘TemplateClass’ class in its own ‘TemplateClass.lua’ file and treat it like a Lua ‘module’. You can see in ‘main.lua’ how I import and create an instance of ‘TemplateClass’.

2. Static vs Instance Members

The instance members in this demo work great. I had static methods and static vars working too, but broke them somehow. I have removed them from this demo. I’m confident is possible.

3. Publicity / Privacy

The instance members in the demo feature full, working publicity and privacy. Nice.

4. Inheritance

I have not included inheritance in this demo, but it is possible. I’m working on a simple game that I will post soon. I have 3 generations of inheritance going on and it works FAIRLY well. For my onscreen objects I extend using ‘display.newGroup()’ as a base. It is a bit ugly how to override methods (See the Ludicroussoftware.com link above), but it works. I’ll post that in the future.

The Output

[actionscript3]
Copyright (C) 2009-2011  A n s c a ,  I n c .
Version: 2.0.0
Build: 2011.704
The file sandbox for this project is located at the following folder:
(/Users/srivello/Library/Application Support/Corona Simulator/HelloWorldOOP-27E895459A9154336232E091AB34F950)

——————-
— HelloWorldOOP —
——————-

TemplateClass:constructor()
TemplateClass:initialize()
samplePublicVar : samplePublicVar
_samplePrivateMethod_str : _samplePrivateMethod & samplePrivateVar
samplePublicMethod_str   : samplePublicMethod

[/actionscript3]

1. Output Tool

By default the output comes through your Terminal (on mac). There is setup to get the output to come through Lua Development Tools (or other Eclipse based editor with the Lua Plugin). Once you build once, you leave the terminal and emulator open and just edit and save your code as you like. With each save, the simulator AUTOMATICALLY reruns the app and the terminal shows the output. The ‘build time’ is 100 Milliseconds or so. The speedy iterative development is great.

2. The Output

You can see in the output example above, the first few lines are outputted by Corona itself, then your custom

Conclusion

I created this demo as part of my evaluation of various mobile programming languages (Lua) and development environments (Corona SDK and Lua Development Tools). Coming from a (objectively speaking) really really spoiled development environment of Flash game development, I have the same basic gripes with Corona as I do with HTML5 gaming. The language (lua) is not fit for OOP. It is not intended to do so. Lua and Corona are indeed LIGHTNING FAST both at compile-time and at run-time. That is fantastic and cannot be under-stated.

The Corona SDK community is growing and offering some add-ons;

  • Lime – Tilebased gaming
  • PubNub – Multiplayer Gaming API
  • More community projects…

And now a few tangents…

Do I Need OOP?

No. But for me an implied architecture (implied within the built-in language features) of OOP or component-based development greatly speeds up development for me. I’m able to get more feedback from the IDE and reuse code more effectively. Many developers prefer procedural programming. I’m not sure why. If you have an opinion please post below. We will see TONS more gaming built upon the horrible limitations of JavaScript. If you love JavaScript, that is great. For me its not the right tool for game development.

Some OOP Solutions for Corona;

Upon a quick look, each appears to be valuable. Not sure which is the most full featured yet. In the future I may create a demo of each for comparison’s sake and blog about it.

Do I need a strong IDE?

Yes. I’m dumbfounded by developers who defend using text-edit as their tool of choice. Sure there is an warm-fuzzy feeling about being so ‘raw’. But an honest appraisal of your productivity will trump that if you are a serious contributor to your industry. Spend a few hundred dollars, spend a few thousand dollars on performant hardware and legally-licensed software designed for your productivity. Be a professional.

Game Development Environment Utopia

In my research in gaming technologies (Many, many HTML5 frameworks, Flash Platform, Unity3D, iOS, Android, Cross-platform iOS/Android), I am evolving an idea for the ideal game development setup. This list will probably change over time. The dream is a setup that works for small game projects and can scale up to large team projects.

  • Fast Code-Test-Code Cycles – Under 1 second allows for optimal iterative development
  • Fast Run-Time Performance – Stable 30 frames per second or greater across target devices
  • Great IDE – Project creation, project compilation, project debugging (breakpoints, stack/heap introspection), intellisense on built-in and custom libraries, etc..
  • Strong Typed Language – Implicit intent in your design, IDE-feedback/errors/auto-fixes, generics, deep refactoring, etc…
  • Scalable Graphics Pipeline – To facilitate multi-screen development. Vector source with run-time conversion to raster seems to be the best setup yet for 2D. Streaming textures is ideal for 3D.
  • Implied Architecture – OOP (ex. Java) and/or component based (ex. Unity3D)

Stay Tuned

  • I have created a complete game using Corona. A tutorial, HD Screencast Video, and full source code are coming soon.

Questions for the Readers

  • Do you a better OOP setup? Fork my code and push a solution. Great!
  • Know how to setup LDT to show debug output and breakpoints? Post a comment below!
  • Can you setup LDT to show intellisense (auto complete) for the Corona SDK classes? Post a comment below!

New Corona Book Released!

Packt Publishing has published a new exciting book on Corona SDK – Corona SDK Hotshot!

If you’ve used the Corona Software Development Kit to build your very first new mobile app, you already know how easy it makes developing across all the pieces of this fragmented market. This book upgrades your knowledge of Lua and the Corona API with designs, habits and advanced concepts to speed your development and create more exciting apps.

Corona SDK Hotshot will show you how to combine advanced Lua features such as coroutines and metatables with Corona’s sophisticated tools, including physics and networking, to develop exactly the game or app you or your customers need, quickly and with an eye towards updating your app with improvements in the future.

Corona SDK Hotshot will expand your basic knowledge of Corona with an insight into making the most of its event platform, using physics wisely and easily, and moving on to advanced programming tasks like path-finding.

You will focus heavily on how to keep your programs understandable as they become more complicated, by using modules and events to divide it up. You’ll practice ways to make AI scripts and map files easily understandable to designers and other collaborators, and use networks like GameCenter to publish progress.

The last projects will combine the full range of covered material to illustrate how you can produce sophisticated and exciting apps as a Corona Hotshot!

Using a project based approach you will learn the coolest aspects of Corona SDK development. Each project contains step- by-step explanations, diagrams, screenshots, and downloadable materials.

Get the book here: http://www.packtpub.com/corona-software-development-kit-hotshot/book

Next Steps

  • Hello World – Download the full source code*
  • Hello World OOP – Download the full source code*
  • Hello World OOP – Watch the HD Screencast Video Tutorial*
  • Checkout More Tutorials on LearningCorona.com (Fantastic!) and DesignerSandbox.com

*See ‘Member Resources’ below.

Member Resources

[private_Free member]Enjoy this members-only content!

Source Code

HD Screencast Videos

[tubepress video=”43251034″ embeddedHeight = “350” embeddedWidth = “550” showInfo = “false”]

[/private_Free member]

Node.js for Flash & Flex Introduction

While researching technologies for a new Flash multiplayer gaming project, I came across Node.js as a backend techology. I’ve heard of it for a while, but have not yet used it. Its nice.

Node.js is a server software that allows you to a) run JavaScript on the server and b) talk to/from the client-side using http and socket connections. While not designed with Flash in mind, you can easily connect Flash (or Flex) to the socket connection and get real-time data flowing to/from. Very nice.

Uses for Node.js with Flash

What I think is immediately attractive is that you can easily setup a backend for your games. Its running in JavaScript which is easy to use and learn and the write-compile-test cycle couldn’t be faster. You could feed dynamic data to your game such as levels in a level based game. You could feed configuration information in so that you can easily edit it without editing your Flash project. You can create real-time data feeds or multiplayer gaming.

Note: Node.js is light-weight. You’ll have to code pretty much anything (multiplayer gaming) you want to add to it. It is a great starting point though.

Tutorial

I created the following example, and this post within an hour. Within 5 minutes you can setup your own running version of the demo shown in the post. Follow along here or simply download the full source code (See ‘Member Resources’ below) and check it out.

Note: I’m running the node.js server and the Flash swf on my local computer. I imagine this is where I would develop the full game. Its fast and easy to run/edit/run. Then I’d migrate the project to a server. I *think* its trivial to get this running up on a webserver for your users to enjoy, but I have not done that yet.

A. Installing Node.js (on Mac)

  1. Download Node.js
  2. Run the installer
  3. You now use the Mac OSX Terminal program on Mac (or Find any ssh terminal emulator program for Windows) to run Node. We’ll do that farther below.
  4. Done!

B. Running the server on Node.js (via Socket)

  1. Create a new text file HelloWorldNodeJS.js and save (anywhere?) on your local machine
  2. Edit the file in your favorite text editor. For now, just enter the code below this list into that file and save.
  3. Open Terminal and run one line –  ‘node /path/to/your/dir/HelloWorldNodeJS.js’
  4. Done!

[actionscript3]

// ————————————–
// Imports
// ————————————–
var net = require(‘net’);
var mySocket;

// ————————————–
// Construct The Socket
// ————————————–
// create the server and register event listeners
var server = net.createServer(function(socket) {
mySocket = socket;
mySocket.on("connect", onConnect);
mySocket.on("data", onData);
});

// ————————————–
// Events
// ————————————–
/**
* Handles the Event: <code>"connect"</code>.
*
*/
function onConnect()
{
console.log("Connected to Flash");
}

/**
* Handles the Event: <code>"data"</code>.
*
* When flash sends us data, this method will handle it
*
*/
function onData(d)
{
if(d == "exit\0")
{
console.log("exit");
mySocket.end();
server.close();
}
else
{
console.log("From Flash = " + d);
mySocket.write(d, ‘utf8’);
}
}

// ————————————–
// Start the Socket
// ————————————–
server.listen(9001, "127.0.0.1");

[/actionscript3]

C. Stopping the server on Node.js (via Socket)

Once you run B.3 above, the server runs and stays running unless you program your client or server to kill the connection. If you try to run B.3 without killing the connection you’ll see an error in Terminal (on Mac) containing “Error: listen EADDRINUSE”. To manually kill the connection (this is required if you want to edit and run B.3 again) then run the following sequence.

  1. Open Terminal (on Mac) and run ‘ps aux | grep node’
  2. This will show a series of lines like this ‘srivello       PID   0.0  0.1  3064476   7152 s002  T     4:41PM   0:00.12 node HelloWorldNodeJS.js’.
  3. Where you see ‘PID’ that is the PID. Your PID will be different it will be a #.
  4. Then run ‘kill -9 PID’. Replace PID with your #.

D. Running the client in AS3 (via Socket)

  1. Create a new Flash project using your favorite IDE. My example uses Flash Builder 4.6.x.
  2. Edit your main document class. For now simply replace the class with the code below this list and save.
  3. Compile and run the code. See your output window for the exciting details.
  4. Done!

[actionscript3]

package
{

// ————————————–
// Imports
// ————————————–
import flash.display.Sprite;
import flash.events.DataEvent;
import flash.events.Event;
import flash.events.IOErrorEvent;
import flash.events.KeyboardEvent;
import flash.events.MouseEvent;
import flash.net.XMLSocket;
import flash.text.TextField;
import flash.ui.Keyboard;

// ————————————–
// Class
// ————————————–
/**
* <p>The <code>NodeJSDemo</code> class is …</p>
*
*/
public class NodeJSDemo extends Sprite
{

// ————————————–
// Properties
// ————————————–
// PUBLIC GETTER/SETTERS
/**
* The core object which connects client to
* server for real-time communication
*/
private var _xmlSocket:XMLSocket;

/**
* The sole UI element to show some test output
*/
private var _textField:TextField;

// PUBLIC CONST

// PRIVATE

// ————————————–
// Constructor
// ————————————–
/**
* This is the constructor.
*
*/
public function NodeJSDemo()
{
// SUPER
super();

// EVENTS
addEventListener(Event.ADDED_TO_STAGE, _onAddedToStage);

// VARIABLES

// PROPERTIES
_textField = new TextField ();
_textField.width = 300;
_textField.height = 300;
_textField.multiline = true;
_textField.htmlText = "";
addChild(_textField);

// METHODS

}

// ————————————–
// Methods
// ————————————–
// PUBLIC
/**
* Handles the Event: <code>Event.CHANGE</code>.
*
* @param aEvent <code>Event</code> The incoming aEvent payload.
*
* @return void
*
*/
private function _onAddedToStage(aEvent : Event):void
{
// CREATE THE SOCKET AND CONNECT – I’M NOT SURE WHAT PARAMETERS ARE VALID HERE
// BUT IT MUST MATCH THE SETTINGS WITHIN THE ‘HelloWorldNodeJS.js’ FILE YOU ARE USING
_xmlSocket = new XMLSocket("127.0.0.1", 9001);

// EVENTS
stage.removeEventListener(MouseEvent.CLICK, _onAddedToStage);
//
_xmlSocket.addEventListener(Event.CONNECT, _onConnected);
_xmlSocket.addEventListener(IOErrorEvent.IO_ERROR, _onIOError);

}

// PRIVATE

// ————————————–
// Event Handlers
// ————————————–
/**
* Handles the Event: <code>Event.CHANGE</code>.
*
* @param aEvent <code>Event</code> The incoming aEvent payload.
*
* @return void
*
*/
private function _onConnected(aEvent : Event):void
{
// TRACE
trace("onConnect() aEvent: " + aEvent);

// EVENTS
_xmlSocket.removeEventListener(Event.CONNECT, _onConnected);
_xmlSocket.removeEventListener(IOErrorEvent.IO_ERROR, _onIOError);
//
_xmlSocket.addEventListener(DataEvent.DATA, _onDataReceived);
_xmlSocket.addEventListener(Event.CLOSE, _onSocketClose);
//
stage.addEventListener(KeyboardEvent.KEY_UP, _onKeyUp);

}

/**
* Handles the Event: <code>Event.CHANGE</code>.
*
* @param aEvent <code>Event</code> The incoming aEvent payload.
*
* @return void
*
*/
private function _onSocketClose(aEvent : Event):void
{
// TRACE
trace("_onSocketClose aEvent : " + aEvent);

// EVENTS
stage.removeEventListener(KeyboardEvent.KEY_UP, _onKeyUp);
_xmlSocket.removeEventListener(Event.CLOSE, _onSocketClose);
_xmlSocket.removeEventListener(DataEvent.DATA, _onDataReceived);
}

/**
* Handles the Event: <code>KeyboardEvent.KEY_UP</code>.
*
* @param aEvent <code>KeyboardEvent</code> The incoming aEvent payload.
*
* @return void
*
*/
private function _onKeyUp(evt:KeyboardEvent):void
{
// HANDLE KEYS
if (evt.keyCode == Keyboard.ESCAPE) {
//1. SEND ‘KILL THE SERVER’ TO THE SERVER
_xmlSocket.send("exit");
}
else {
//2. SEND ANY NON-ESCAPE KEY’S CODE (’38’ FOR EXAMPLE) TO SERVER
// THIS IS A SILLY EXAMPLE OF SENDING A NUMBER TO THE SERVER
// JUST SO THE SERVER CAN SEND IT BACK. SIMPLE.
_xmlSocket.send(evt.keyCode);
}
}

/**
* Handles the Event: <code>DataEvent.DATA</code>.
*
* @param aEvent <code>DataEvent</code> The incoming aEvent payload.
*
* @return void
*
*/
private function _onDataReceived(aEvent : DataEvent):void
{
try {

// Show the server data in text
_textField.htmlText += ("From Server: " + aEvent.data + "\n");

//scroll down to show latest line
_textField.scrollV = _textField.maxScrollV;

} catch (error : Error) {
// TRACE
trace("_onDataReceived error: " + error);
}
}

/**
* Handles the Event: <code>IOErrorEvent.IO_ERROR</code>.
*
* @param aEvent <code>IOErrorEvent</code> The incoming aEvent payload.
*
* @return void
*
*/
private function _onIOError(aEvent : IOErrorEvent):void
{
// TRACE
trace("_onIOError aEvent: " + aEvent);

// EVENTS
_xmlSocket.removeEventListener(Event.CONNECT, _onConnected);
_xmlSocket.removeEventListener(IOErrorEvent.IO_ERROR, _onIOError);
stage.addEventListener(MouseEvent.CLICK, _onAddedToStage);
}

}
}

[/actionscript3]

E. Updating your client/server

  1. Revisit steps B.2 and B.3 for server
  2. Revisit steps C.2, D.2 and D.3 for client
  3. Done!

Pretty awesome.

Next Steps

  • Read an overview of What is Node.js?
  • Checkout the official homepage for Node.js
  • Download the full source code (See ‘Member Resources’ below).

Member Resources

[private_Free member]Enjoy this members-only content!

[/private_Free member]

Live Online Training: Intro To The Starling Framework For AS3

Starling is a 3rd-Party AS3 framework For Flash Development. It mimics the Flash displaylist API but enables powerful 2D GPU-accelerated rendering.

With the help of the Hawaii Adobe Flash User Group, on Thursday April 26th at 5pm EST (2pm PST), I will give a live online screencast to explain more about Starling. Come join us!

Live, Free Online Training

Title: Introduction To Stage3D Flash Gaming With Starling
Date: April 26, 2012 05:00 PM – 06:00 PM (GMT-5 Eastern Time US & Canada). Duration: 50-60 minutes.
RSVP: The event is closed.
Location: Free, On-line through Adobe Connect. The event is closed.
Speaker: Samuel Asher Rivello is the principal of Rivello Multimedia Consulting (RMC). RMC’s Flash and Flex services include software architecture, consulting, development, and training. Sam has over a decade of experience creating games and applications, and is currently traveling the globe to collaborate with top companies. Sam is an Adobe Certified Designer and Developer for Flash, an Adobe Flex Champion, an international public speaker, and a university instructor. His writing and coding have appeared in leading publications such as Adobe’s “EDGE”™ online magazine, and Futurenet Publishing’s “Computer Arts Projects”™ print magazine.

Follow Sam on Twitter: @srivello

Agenda:The session will start with the benefits of Flash for gaming and some new features. We’ll look at Stage3D – Flash Player 11’s GPU accelerated rendering pipeline for 2D and 3D gaming. The bulk of the session will be looking at code for a very simple, yet complete 2D game built with the Stage3D Starling Framework. All source code will be provided to attendees.

Bonus: Time-permitting we’ll checkout two hot Starling extensions – a vector graphics plugin and a particle effects plugin.

Next Steps

  • Now Available!: The full 65 minute recording of the online session (See ‘Member Resources’ below).
  • Now Available!: The full source-code will be available (See ‘Member Resources’ below).
  • Now Available!: The presentation slides will be available (See ‘Member Resources’ below).
  • Now Available!: The relevant links will be available

Member Resources

[private_Free member]Enjoy this members-only content!

Watch Recording of Adobe Connect Session

Watch Slideshow

[slideshare id=12707922&doc=rmcintrostarlingframeworkv1-120426171841-phpapp01]

Links

Download Source Code

[/private_Free member]

Robotlegs Framework Template

Robotlegs (from Robotlegs.org) is  a great architectural framework for AS3. It works for both Flash and Flex projects. I have been a fan since the beginnings of the framework and I even created the official “Robotlegs Framework Diagram“.

One of the drawbacks of using an architectural framework is the time required to setup the project. To help new developers, veteran developers, and myself, I create and update several templates for Robotlegs (RL). Each is a complete publishable “Hello World” type project. When I start any new RL project I begin with one of these Robotlegs Templates (RLT).

It kicks ass, enjoy!

Screenshots

It is a simple app. (Note images may vary slightly depending on template)

Mix-ins

I combine RL with some other fantastic technologies in some templates.

Next Steps

  • RLT_Web_Flex – The original! (See ‘Member Resources’ below)
  • RLT_Web_Flex_AS3Signals – My favorite! (See ‘Member Resources’ below)
  • RLT_Web_Flex_AS3Signals_BabelFX – (See ‘Member Resources’ below)
  • RLT_AIR_FlexMobile_AS3Signals_BabelFX – (See ‘Member Resources’ below)
  • RLT_AIR_FlexMobile_AS3Signals_Multiplayer – (See ‘Member Resources’ below)

Member Resources

[private_Free member]Enjoy this members-only content!

[/private_Free member]

HTML5 Framework – Sencha’s Ext JS 4 HelloWorld

In a recent article I overview the major community/commercial projects in HTML5 for HTML5 Game Frameworks as well as HTML5 App Frameworks. One of the app frameworks I listed there is the Sencha Ext JS 4 Application Development Framework. This post serves as a tutorial to get you started.

The full source code and 3 HD Screencast Video are available far below. For general questions. please comment below. For RMC’s Consulting services, please contact us today!

Before You Start

Before you follow along with this tutorial you’ll need to setup the development environment for Sencha. This includes a web browser, a web server, and a text editor (or code IDE). I’m using a Mac Computer  w/ Chrome Browser, Mac Web Server, and Komodo Edit. I’m new to Komodo Edit and cannot yet recommend it.

Follow the setup instructions here in the Sencha Getting Started docs.

1. Hello World For Application Development

Typically a Hello World program illustrates the quickest way to get anything (such as text) onto the screen and publishing (or compiling) without errors.

In this post I have also added a few things. We see a Sencha component (Viewport), Sencha classpathing (src), a custom super class, a custom subclass, and an example of a mixin class (which allows for something like multiple inheritance).

The Project Output

Here is the example running. I show it running in both Desktop browser and iOS (through an emulator I have – provided by Apple, not Sencha). Sencha also offers a ‘Sencha Touch’ library that is built specifically for mobile. I’m NOT using that here. I’m just using the mobile browser to show (not-specifically-mobile) HTML5 content. Works pretty good.

Debugging: In the chrome window, its clear that the bottom is using Chrome’s Built-In View->Developer->Developer’s Tools which Sencha outputs to very nicely.

In Chrome on Mac

In iOS (Via Emulator)

The Project File Structure

Sencha’s official getting started recommends some (optional) folder structure. I choose something I feel more comfortable with here;

The Entry Point

You can see the index.html loads 3 external files.

[gist id=”1894698″]

1. Styles

I’m using the default CSS I found in some basic tutorials. I have not yet added/edited any styles. In the future I’ll study more on what’s possible.

2. Libs

There are a few choices that ExtJS gives you out of the box, each with their own distinct advantages or disadvantages. You only need to use one.

Here is a rundown of each of the files.

  • ext-all-debug-w-comments.js – Debug version of the entire framework, with comments. This is the largest file of the bunch and requires the most processing to display in browsers.
  • ext-all-debug.js – Same as above, but without the comments. Still very large, but very good for debugging in most cases.
  • ext-all.js – The entire framework concatenated and minified. Debugging is impossible with this file, so it should be used for production systems only.
  • ext-debug.js – This file contains the Ext JS foundation and white-space. With this file, you can remote load all of Ext JS as needed, and it provides the best debugging experience. The tradeoff is that it’s the slowest.
  • ext.js – The minified version of ext-debug.js.

3. App

The app.js file is the entry point for your custom code. It is where you put all your custom stuff as well as the ‘src’ folder and the ‘assets’ folder.

Within my custom code I show off a few interesting things;

Components

I have not dug deep into Senchas Component library but DAMN there are many good looking components. There are components for Accessibility, Grids, Charts, Tabs, Windows, Trees, Layout, Managers, Drawing, Drag and Drop, Toolbars, Menus, ComboBox, DataView, Forms, MVC, and more!

Here is a simple example of a ViewPort (basically a 100% 100% canvas within-which you can put panels or other things).

[gist id=”1894732″]

Classpathing

Sencha has a nice way to separate your code into classes and your classes into packages. The root of all your packages is your source folder or your ‘classpath’ in Adobe Flex parlance – if you are familiar with that. Classes/packages help greatly with both organization and debugging (breakpoints and errors show you (more) clearly where the problem is).

First we configure one (like here) or more classpaths

[gist id=”1894577″]

And to load and use a class from the main app…

[gist id=”1894638″]

I read in the documentation that the process is called ‘dynamically loading’ of classes. Coming from Flex, I thought ‘dynamically’ meant something really special. But it doesn’t. It means this ‘feels just like Flex  – Classes can import each other as needed, and then you just run the program’. Since JavaScript does not natively support OOP development just about every HTML5 framework requires the developer to use some framework-level conventions to mimic OOP. In the case of Sencha it seems to work quite nicely.

Here is the super class.

[gist id=”1894665″]

Here is a subclass which extends that super class.

[gist id=”1894679″]

Here is a mixin class which the subclass uses.

[gist id=”1894685″]

2. ExtJS MVC Template

If you enjoyed (and understood) the ‘Hello World’ example above, here is something more advanced for you.

In the spirit of the Robotlegs MVC Templates I created for AS3/Flex projects, I created an ExtJS MVC Template.

The idea of the template is to create (and later evolve slightly) a polished, simple example of an MVC app. This can serve as a starting point for all new ExtJS projects. MVC is a popular methodology to separate the model (data), view (user interface stuff), and controller (the ‘what’ that happens when you click UI and stuff).

The app features a simple ui with ‘load’ and ‘clear’ buttons. The load (See ‘Figure 1’) button from the view communicates to the controller which loads data from the model into the view. Clear works in a similar way (See ‘Figure 2’). Its very basic, but illustrates some key concepts about Sencha.


Figure 1.

Figure 2.

Checkout the full source code and 3 HD Screencast Videos (See ‘Member Resources’ below).

Conclusion

As part of my evaluation of HTML5 App Frameworks, I need to look at some other frameworks before I give an educated opinion. However, I’m happy with what I see in Sencha. The language looks good, the styling appears to be very flexible and robust, and the components (from a user’s perspective) look and feel great.

Some things I’d like to do next; I may try to make a blog reader app to load xml, parse it and populate a data grid as a future project with Sencha. I’d like to create a more complex OOP example which includes private/public members and fires events. All of which I know how to do, but have not documented yet. I’d also like to create a Sencha Touch demo or 2, which I think will be 99% identical code, but more suited for running on mobile as an app rather than the demos above which are for web browsers.

Next Steps

    • Hello World – Download the full source code*
    • Hello World – Watch the HD Screencast Video Tutorial*
    • ExtJS MVC Template – Download the full source code*
    • ExtJS MVC Template – Watch the HD Screencast Video*
    • For general questions. please comment below. Thanks!
    • For RMC’s Consulting services, please contact us today!

*See ‘Member Resources’ below.

Member Resources

[private_Free member]Enjoy this members-only content!

Source Code

HD Screencast Videos

[tubepress video=”39885869″ embeddedHeight = “350” embeddedWidth = “550” showInfo = “false”]

[tubepress video=”39857820″ embeddedHeight = “350” embeddedWidth = “550” showInfo = “false”]

[tubepress video=”39857830″ embeddedHeight = “350” embeddedWidth = “550” showInfo = “false”]
[/private_Free member]

Tutorial Series: ActionScript 3.0

Learn Adobe’s ActionScript 3.0 – From Basics to Advanced

ActionScript 3.0 (AS3) is a powerful object-oriented programming language with similiar roots to JavaScript. One could say that ActionScript 2.0 was equivalent to JavaScript and AS3 is a much more mature version with support for classes, interfaces, namespaces, events, and more. This video series is designed to give new programmers a perfect place to start. There is also content for advanced programmers too.

Next Steps

Download the complete tutorial source code (See ‘Members Resources’ below) and watch these great videos:

1. IDE (Code Editors)

  • 1.1 Flash Builder: Install & Project Setup (See ‘Resources’ below) (Watch Video)
  • 1.2 Flash Professional: Install & Project Setup (See ‘Members Resources’ below)
  • 1.3 FDT: Install & Project Setup (See ‘Members Resources’ below)

2. Basic Programing (via Flash Builder)

  • 2.1 AS3 Basics With Cocktails: (See ‘Members Resources’ below)

3. Advanced Programming (via Flash Builder)

  • 3.1 AS3 OOP Programming With Cocktails: (Coming Soon…)
  • 3.2 Design Patterns With Cocktails: (Coming Soon…)

4. Frameworks (via Flash Builder)

Resources

Member Resources

[private_Free member]Enjoy this members-only content!

  • Download the complete tutorial source code
  • Click the video thumbnails below to watch the videos.

[tubepress mode=”vimeoChannel” vimeoChannelValue=”285406″ hqThumbs=”false” ]
[/private_Free member]

Want More Video Tutorials?

[polldaddy poll=5983808]

Wishlist Member WordPress Plugin Tutorial

Now And There

One of my companies is Now And There. The website NowAndThere.com was launched ages ago, and is updated regularly with new blog articles. Currently users come via Google search or perhaps following a Twitter post and arrive to read an article or two. There is no login. Its just a simple blog. I would like to add membership to the site.

This RMC post is a fantastic, thorough tutorial on the before and after of a membership website. It includes text and images here in the post. Below the post there are 3 great HD Screencast Videos (See ‘Member Resources’ below) which repeat what we have here in the post plus much more!

Why Add Membership?

I would like to increase traffic on NowAndThere.com. The 2-prong goal is to get traffic and then keep traffic. Getting new traffic is outside the scope here, but I figure once people visit, I’d like them to stay for a while and even return another day. I think a newsletter (monthly, quarterly, etc…) is a great way to invite current readers back to the site. But, if users are going to express interest in a newsletter and fill out a form (with at least their email), why not keep them as ‘members’? With membership I can offer the newsletter as well as exclusive content. Plus by keeping some content for members only, I can encourage more casual readers to become members (and thus receive the newsletter. I’m rambling, but for me membership + newsletter is the best plan to meet my goals.

1. The Plan

The site currently (See ‘Figure 1’) features no membership. We will change the page layout to provide a membership widget (See ‘Figure 2’).  This membership will allow for non-members to log-in/sign-up and allow logged-in members to see their membership information and to log-out.


Figure 1.

Figure 2.

Membership allows to protect (or restrict) the content on the site for certain members. Its a fairly flexible content. A site could have an entire site that requires membership or just select content which require membership. A site could offer just one level of membership or have multiple levels (at various prices for example).

An analysis of how I would like the site to work is as follows (See ‘Figure 3’). I would like the site’s content to be unprotected by default, but to offer a quick, free membership sign-up to see some posts and in some specific cases to see some parts of some posts. In a broad sense its a 90% unprotected site, with 10% of the content that requires membership. My idea is to encourage sign-up WITHOUT turning away the casual readers. I can always change the 90/10 balance in the future as I see fit.


Figure 3.

The schemes shown (See ‘Figure 3’) will work as follows;

    • Scheme #0 – Unprotected content. No membership required. (See ‘Figure 5’ for an example)
    • Scheme #1 – An unprotected post which gives the gist of the story and then protects the rest  (See ‘Figure 6’ for an example)
    • Scheme #2 – A protected post. Users will see it listed on the front page, but cannot see any of the post without membership. (See ‘Figure 7’ for an example)
    • BONUS – This last scheme is a modified version of #1 where the entire post is unrestricted and only a list of links at the very bottom is protected. (See ‘Figure 8’ for an example)

Figure 4.

Figure 5.

Figure 6.

Figure 7.

Figure 8.

2. The Process

The Membership Plugin

As mentioned before (See ‘Figure 3’) the NowAndThere.com website was created with the popular website creating tool WordPress. If you are new to WordPress, checkout my complete WordPress: Install & Introduction post which includes HD screencast video. To add membership to NowAndThere we will be using the Wishlist Member (WLM)Wordpress plugin.  If you want to know more about the plugin, read my Wishlist Member WordPress Plugin Review post or simply follow along with the tutorial post you are currently reading.

Before You Start

In addition to this post and the 3 HD screencast videos (See ‘Member Resources’ below) I recommend reading the features on the Wishlist Member website’s features section, the showcase of example websites, the support/documentation, and review the extensive Wishlist Member video series.

All of this will help you learn – what is possible, what you want to do, and how to do it.

Installation

First, do a complete backup of your website. I recommend that before any website development, especially significant development like this.

Second, you must purchase and download the plugin from the Wishlist Member website. Then access the admin of your existing WordPress site, visit the plugins page, and upload the new plugin. Activate the plugin. You will notice (thankfully) that after activation your site has not changed. This allows you to install the plugin safely without changing your user experience.

Setup

Now that the plugin is activated you will begin setting up the plugin. During the course of this process your website will be in limbo. Your user experience will change. For instance you may restrict access to a page but not yet add the widget allowing users to sign-in. So no one can reach that page. This is ok. Its just something to remember. You will want to plan well to minimize the effect on your users. Depending on your familiarity with WordPress and Wishlist Member and the complexity of your site and content protection scheme the entire process may take hours or days of development.

Here is the ordered approach I used with NowAndThere after activating the WLM plugin;

  1. Access the WLM dashboard within your WordPress admin
  2. Add licensing information you get via email from WLM
  3. Follow the ‘Setup Wizard’
  4. Add the Registration Widget to your Sidebar
  5. Create Membership Levels (I created just 1)
  6. Add/Edit Error pages. This is what users see during the sign-up process, sign-out process, and other situations
  7. Edit the WL Member » Settings » Protection Defaults
  8. Edit the WL Member » Settings » Protection Defaults » “Text to display for content protected with private tags”. This is what users see for Scheme #1.
  9. Edit the WL Member » Settings » Email Text. This is what users see during the sign-up process.

Expert Tip: Open two web browsers. With #1 – log-in to WordPress and the WordPress Admin. Open your website too (like a logged in user). With #2 – do not log-in to your website. Open the website (like a non-logged-in users). This way you can easily test the logged-in and not-logged-in experience during your development.

3. The Result

Since starting this post, obviously the NowAndthere website has been updated. It now has full membership integration. Nice!

I have not yet added the newsletter. I will gather some members for a while and then use a 3rd party email system, such as MailChimp.com to send my first newsletter to all my current members next month or next quarter.

Ready to see the results? Great. Remember you must sing-up to NowAndThere (click here) to see the logged-in experience and log-out (use the sidebar widget) to see the logged-out experience. Have fun!

Live Examples of each protection scheme;

Next Steps

  • Watch the 3 HD screencast videos (See ‘Member Resources’ below). This complete post is explained with commentary and examples.

Member Resources

[private_Free member]Enjoy this members-only content!

HD Screencast Videos

1. Before

[tubepress video=”39631686″ embeddedHeight = “350” embeddedWidth = “550” showInfo = “false”]

2. Planning & Installation

[tubepress video=”39809293″ embeddedHeight = “350” embeddedWidth = “550” showInfo = “false”]

3. The Results

[tubepress video=”39842809″ embeddedHeight = “350” embeddedWidth = “550” showInfo = “false”]

[tubepress video=”39857791″ embeddedHeight = “350” embeddedWidth = “550” showInfo = “false”]

[/private_Free member]